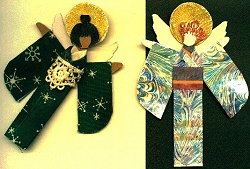
Equipment:
A Dime & A Film Canister,
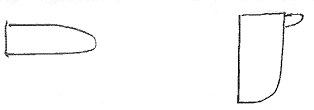
1. Kimono Body and Sleeves: cut out a 4 inch square of paper. If you are making a paper doll, this square will be cut out of the paper that you wish to use for her kimono. If you are making a fabric doll, the square will be made from scrap paper. 2. Fabric doll: Bond the paper to fabric. Trim fabric to square. 3. Cut square in half. One 2" x 4" rectangle is the kimono body. The other rectangle is for the sleeves. 4. Cut the sleeve rectangle into two 1" x 4" strips. 5. Fold the sleeves in half so they are now 1" X 2" and trim one of the lower (open) edges into a curve:
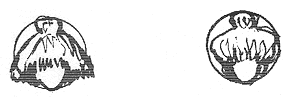
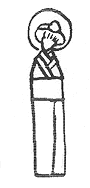
6. Head: On cardstock, with a pencil or erasable marker, trace around a dime. If you prefer to use a compass, make a 3/4", circle. With gel pens, color in a hairstyle. I usually leave the faces on Origami dolls blank. Cut out the head.
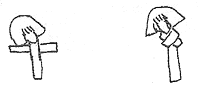
7. Neck: cut out a strip of cardstock that is 1/4" x 2 1/2". Glue the neck strip to the back of the head, with the head at a slight tilt.
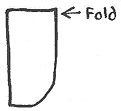
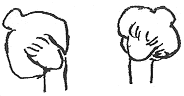
8. Hands: cut 2 pieces cardstock 1/4" x 1". Trim and shape the finger tip end of each hand. Open the sleeve up, and glue the hand in at the fold on the curved side of the sleeve. Glue sleeve completely shut.
9. Undergarment collar: Cut a piece of ribbon, lace or trim 3/4" long. Glue the center of the ribbon to the back of the neck, right at the lower edge of the head. Bring ends to front, crossing them over and gluing them in place:
10. Kimono collar: Fold 1/2" of 2" side of kimono rectangle down, wrong sides together. Press fold. Glue or bond in place. Turn kimono over. Fold down 1/4" and press firmly to form collar.
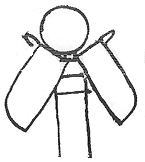
11. Run a small line of glue down the back of doll's body, from ribbon to lower edge. Now, place her on the wrong side of kimono at the center.
12. Put a dab of glue along sides and inside collar of kimono. Fold shoulders down, crossing one slightly over the other.
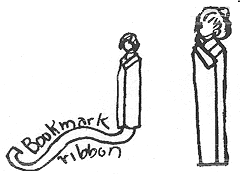
13. Fold sides toward center, overlapping one over the other. Clamp closed while glue sets up. NOTE: if you want to use her as a Bookmark, glue a length of ribbon to the lower inside edge of the kimono before you glue it closed.
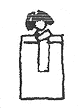
14. Trace around the film canister, or draw a 1 - 1/4" circle with your compass, on white cardstock. Color and shade it with gel pens. If you have some gold foil paper, you could glue it to the halo. Cut out and glue to back of head. 15. Sash: When glue has set up, glue a strip of lace or ribbon or other trim around her waist. You can add other embellishments, if you wish.
16. Glue arms to back of body.
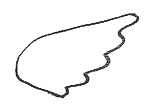
17. Cut wings out of white cardstock. You may color them with gel pens if you wish. Glue wings to back of body, and to top of arm edge.
18. If you wish to hang her as an ornament, glue a string to the back of her halo. If you wish to wear her as a pin, glue a pin to her back. If you want to use her as a magnet, glue a magnet to her back. Enjoy! All the Best! Noreen Please CLICK
HERE (http://dollmakersjourney.com/noreen.html) to view doll
patterns by Noreen Crone-Findlay.
Go to... Dollmaker's Journey A Doll Net Member Site by the Internet Visions Company. |