Materials Required
Glue or transfer the pattern pieces to cardboard and cut out. When transferring the pattern piece for the upper body place on to folded cardboard at fold line. Trace around then cut out and open up. Join upper and lower body pieces together at the waist with sellotape. There is no overlap at the join. The pattern for the wings is also placed on to folded cardboard at the fold line. All the pattern pieces are templates. They are placed on the fabric, traced around, stitched and then cut out leaving a 1/8" (3 mm ) seam allowance. The Doll (pancake style): Place flesh colored cotton and patterned
fabric together right sides facing and stitch together along one of the
26" (66 cm) sides taking a 1/4" (6 mm) seam allowance. Fold fabric
right sides together so that the seam on the top layer matches the seam
on the layer underneath. Place the doll pattern on top, matching
the join line at her waist with the seam and trace around with the air
soluble pen as in diagram 1.
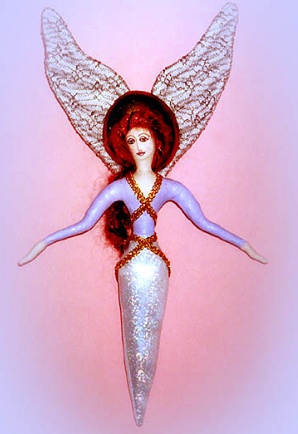
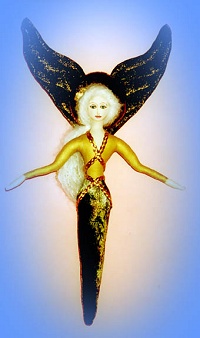
Follow diagram 3 to draw and paint her face. With a soft pencil or air soluble pen draw in the jaw line and the eyes, nose, mouth and eyebrows. When you have the features as you want them color them in with the pens. Color in the whites of the eyes first, then outline the eyes, the eyelids and the iris with the black pen. Fill in the iris with the blue pen and draw in the pupils with the black pen. The eyelids are pale pink and the eyebrows and nose are brown. Outline the mouth and the center line with the brown pen and fill in the lips with red. Highlight the lower lip with the white pen and place a tiny white dot on the same side of each iris to highlight the eyes. Softly shade in the jaw line with the dark umber Prismacolor pencil and put a little blusher on her cheeks with the crimson Prismacolor pencil. Find the center of the 21" (54 cm) long, piece of gold braid and glue the center of the braid to the center back of the neck so that the braid sits over the edge of the gold paint. Bring the gold braid around to the front and cross it over at the V of her top, putting a few small dabs of glue on it to hold it in place. Take the braid around to the back, crossing it over at the back of her waist and then bring it around to the front, crossing it over at the front of her waist and take it around to the back again just below her hips gluing the two ends of the braid to the back of the doll. Hair: Cut 20 x 22" (56 cm) long, pieces of the mohair knitting yarn and wind the yarn around and around at the center as in diagram 4. Form the yarn into a circle large enough to fit around her head and tie with a piece of the yarn to secure as in diagram 5. Glue the circle of yarn around her head so that it frames her face. Pull the hair to one side of her face and with a piece of the yarn tie the cut ends together at the bottom of her hair to secure.Glue the tied ends to the back of the doll over the top of the ends of braid.
Fold the halo fabric in half and place on top of a piece of batting the same size as the folded fabric. Trace around the halo pattern piece with the air soluble pen, put some pins in to hold the fabric and batting together, then stitch around through the 2 layers of fabric and the layer of batting, leaving the opening unstitched for turning. Cut out the halo leaving a 1/8" (3 mm) seam allowance. Turn to the right side out and stitch opening closed. Glue the halo to the back of her head putting plenty of glue on to the bald spot at the back of her head so the halo completely covers it. Wings: Fold the wing fabric in half and place on top of a piece of batting as you did for the halo. Trace around the outline of the wings then stitch right around the outline of the wings through the 2 layers of fabric and the layer of batting. Cut the wings out leaving a 1/8" (3 mm) seam allowance and clip to the V at the center where the two wings meet. Refer to pattern piece and apply fraystop around slit on fabric side of wings where marked. (this side will be the front of the wings). When fraystop has dried, cut the slit and turn wings to right side out. Stitch the slit closed. Refer to the wing pattern piece and trace or copy the quilting lines for the wings. Stitch along the quilting lines. Glue the wings to the back of the doll so that the bottom of the wings sits about 1/2" (12 mm) above her waistline. To help support the wings stitch the center of the wings at the V, to her halo as in diagram 6. Refer to diagram 7 and shape a hook from a small piece of chenille stem turning the ends in and twisting them around so that no sharp ends poke out. Stitch the hook to the back of the wings at the same place the wings were stitched to the halo. She is now ready to hang on the wall and watch over you. Marilyn Nicholson Please CLICK HERE (http://DollmakersJourney.com/friends.html) to see more patterns from Marilyn Nicholson.
Go to... Dollmaker's Journey
A Doll Net Member Site by the Internet Visions Company. |
||||
 Halo:
Halo: