Pattern Sale -
Click HERE!
DOLLMAKER'S JOURNEY
What's New!
-> Go Here!
Search For Pattern!
Search For Designer/Supplies!
Home
Click HERE for What's New!

Download Patterns (PDFs) Available On Etsy ... Click HERE!

FREE TUTORIAL!

Flower Children's Wings
by Jean Bernard

Wings!
Many have asked me to share the technique I used to make the
cellophane wings for my Flower Children found below.
The technique is quite simple so here it is :)

TUTORIAL is also available in PDF.
Click HERE to download PDF file.

Supply List:

**28 gauge wire

**Fantasy Film
DollMakersJourney.com


**Bond Grrrip glue -  www.dollmakersjourney.com

**Micro Marbles~ Gold & Clear -  www.blockheadstamps.com

**Ranger Alcohol Inks -  www.blockheadstamps.com or www.rangerink.com

**Ranger Alcohol Blending Solution -  www.blockheadstamps.com or www.rangerink.com

Hemostat - www.dollmakersjourney.com

Toothpicks

Heat gun


Step 1
Click on Pictures for Larger View.

Wings!

I start with approximately 18" of copper beading wire.

Bend the wire in half.

Wings!

Twist the bottom approximately 1" up the length of the wire.

You now have two separate wires which will be a left and right wing.

Wings!
This is the cool part...no more need for a drawing to make identical left and right wing. Loop both wires over your finger and back down to the top of the twisted wires. You now have identical shapes.
Wings!
Twist wire into place.
Wings!
Continue this process until you get a second row of wings.


Step 2

Wings!

Continue to make a third row of wings smaller than the second row. Twist into place.

Wings!

I want to add some simple shapes to each section. Holding the two wires together, I shape gently adding some character to the wing. Do this to all sections.

Wings!

Step 3

Wings!

Apply Grrrip Glue by Bond to the top of the wires. Apply sheet of Fantasy Film. Let Dry.

Wings!

Flip the wing over and apply glue to the back side of the wire. Sprinkle glass glitter over the Fantasy Film and apply a new sheet of Fantasy film onto the glue. Let dry.

Wings!

Cut and shape the Fantasy Film as close to the wire as you can. Until you get the hang of this, leave a little excess to allow for shrinkage.

Wings!

Heat with heat gun.

Be very Careful ! the wires do get hot so I use hemostats or needle nose pliers.


Step 4

Wings!

Wings!

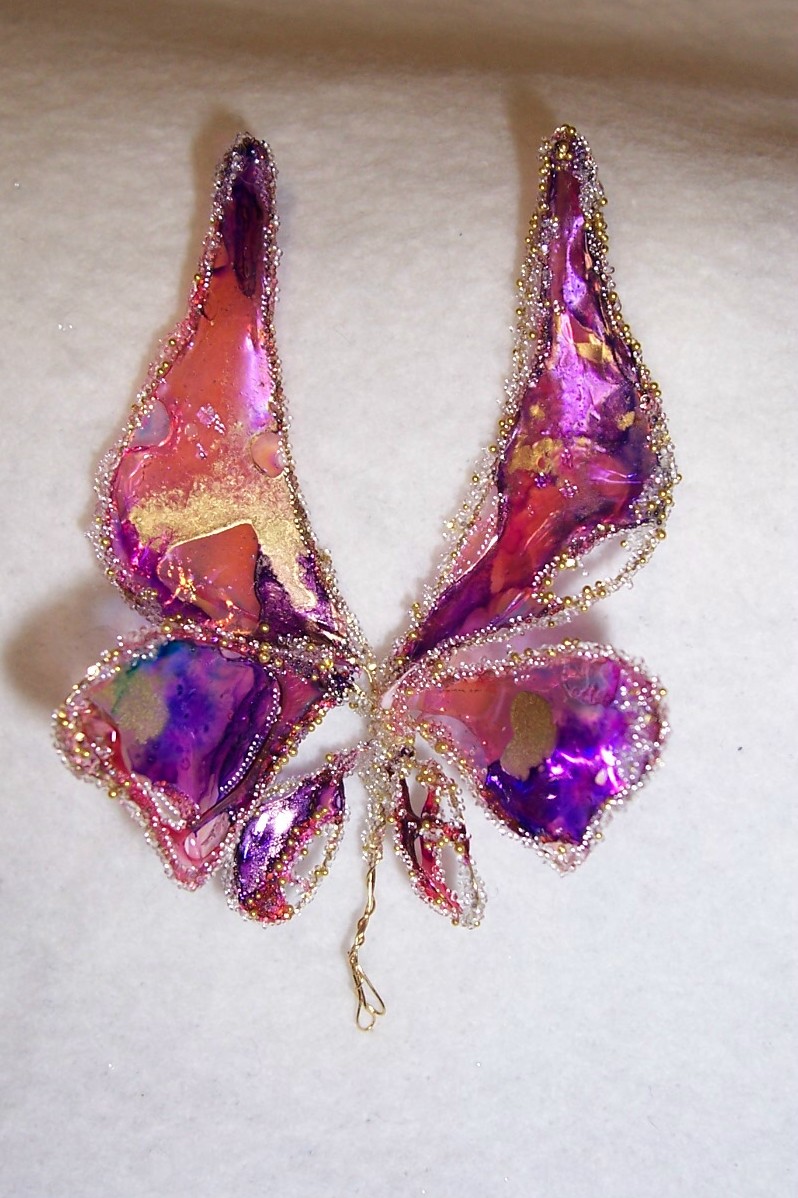
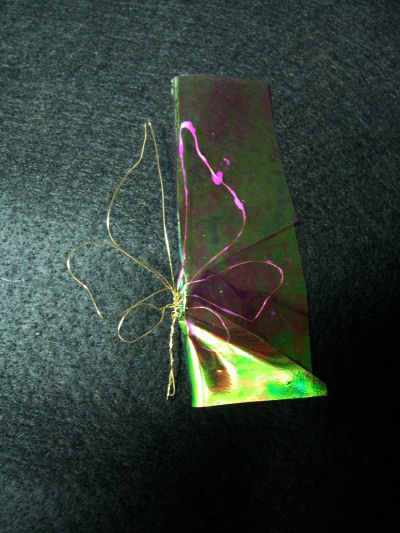
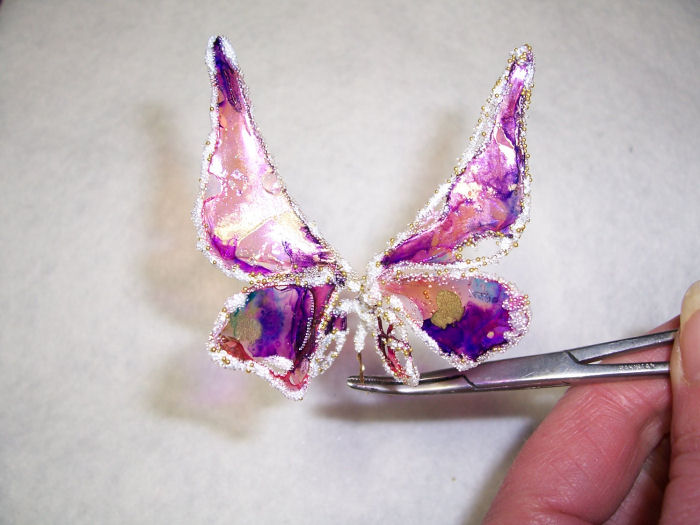
I can stop here but why?

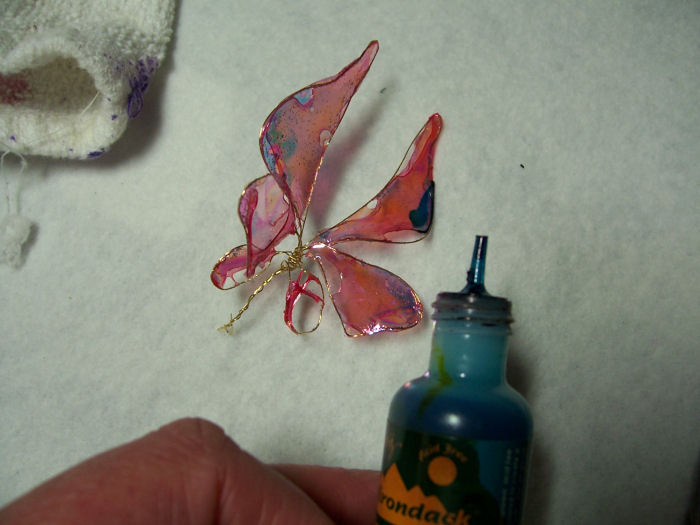
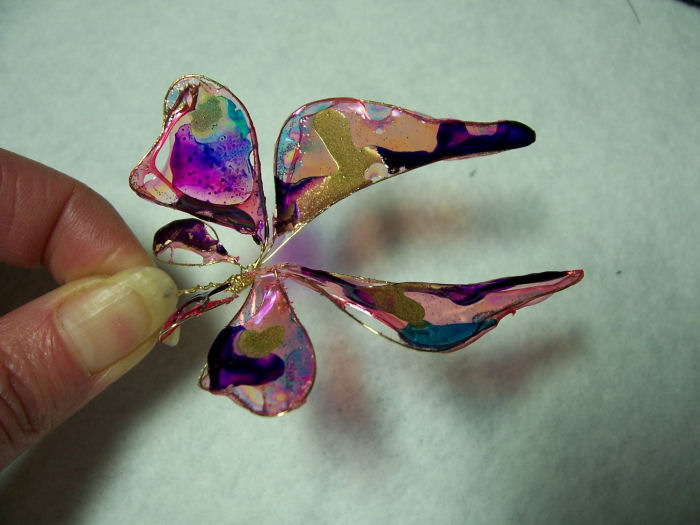
I must add some BLING lol. I added translucent color by using alcohol inks.

I do not follow instructions and played with this cool product that was introduced to me by a friend :) When I dropped the alcohol inks onto the Fantasy film I did not like the effect so I added some alcohol blending solution and woooohoooooooo I got the most awesome effect. You MUST play with this stuff. Works well on clay too. Ask Sherry :) We did a wee makeover on her dolls face in San Diego.


The alcohol dries FAST so work quickly. I have a rag nearby to soak up excess.

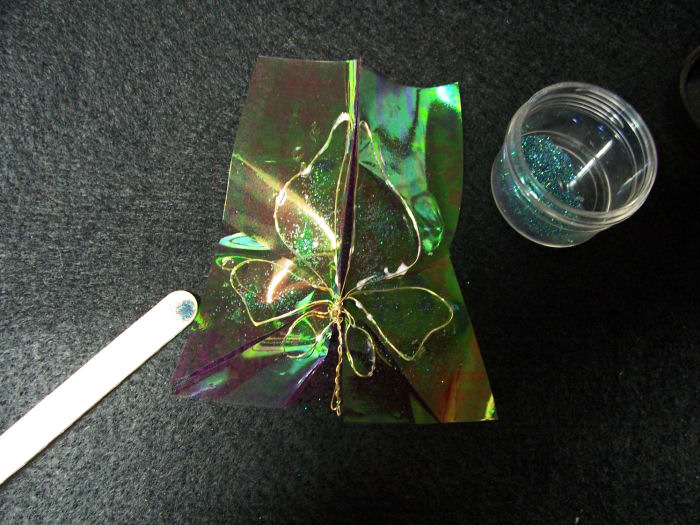
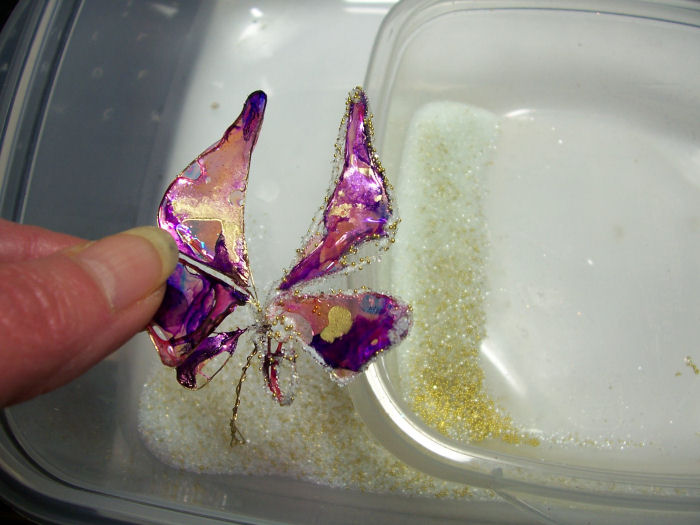
Apply glue to the edges and around the holes.


Wings!


Pour clear and gold micro marbles over the glue. Let dry completely.

Wings!

VOILA ! Crispy, pose able gorgeous wings :)


Click HERE for Jean Bernard patterns.

.

Have you signed up for our "Customer Connection" yet?

Subscribe to receive News and Updates
from Dollmaker's Journey!


Home


Dollmaker's Journey
Info@DollmakersJourney.com

© 1999-2022, Dollmaker's Journey
All rights reserved.
Privacy and Security Statement

Etsy Shop
PDF Downloads!


A Doll Net Member Site 
by the Internet Visions Company.