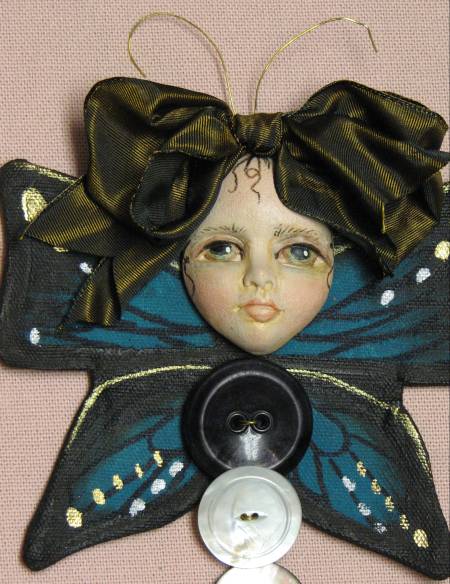
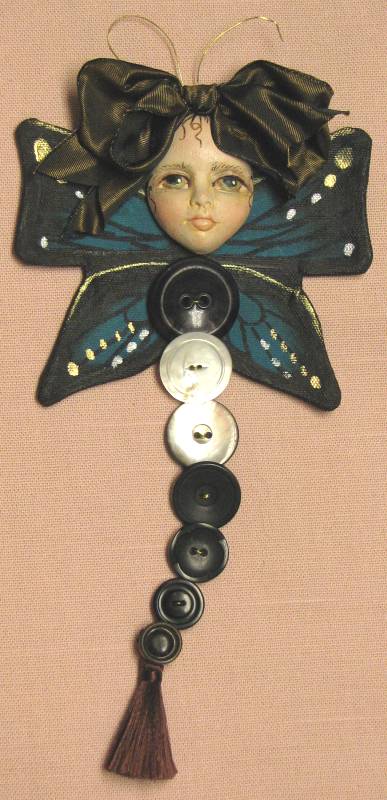
Supplies needed:
• ¼ yard of muslin, cotton ducking or light weight canvas
• Shaya Mold - Click HERE for Mold
• Glue
• Square of felt
• 5 to 7 buttons starting at about 1 ½” and getting smaller
• One charm for the very end or tassel (I used 1 ½1/2” tassel)
• 20 gauge wire
• Freezer paper
• Gesso
• Paints or watercolor pencils
• Permanent pen black or brown
• Spray matte sealer
• 1/2 yard 1 5/8” ribbon with wire edge
Wing Pattern:
Pattern available in PDF format (Click HERE) or Web Graphic (Click HERE).
Wings:
Trace wing template onto freezer paper…cut out…iron on to doubled fabric…stitch around entire template leaving open to turn…remove freezer paper…clip curves…cut out butterfly leaving about ¼” seam allowance…turn and press…
Gesso entire butterfly…let dry…flip over and gesso other side…I then painted entire wing one color…when dry trace details of butterfly on to front surface…paint…let dry…
I did detail veins in permanent marker.
Glue head in place…let dry

Button tail:
Cut a piece of wire about 30” long.
Slip tassel on and bend wire in half…do a twist to wire to secure charm…thread button on wire…starting with smallest and working to larger…thread button from back to front and then loop wire over front and thru holes to back…add next button.
Make two holes below head to slip wire from front to back…twist wire on back side of the wings…make a wire antennas by letting wire come up above head…cut off excess and glue to back top of head…you can put hair on the head if you like, however I made a large bow from ribbon and glues on top of head and you can glue felt to back side of head and wings if you like…this keeps antennas in place and then you can add a hanger to the back of felt….

Hope you have fun and Happy Holidays…


