5. Sew shoulder seams WST 1/2" from raw edges.
6. From the remaining outer fabric cut six
3"x 45" (or width of fabric) strips. Fold the strips in half lengthwise
WST, matching raw edges and press.
7. Beginning at a front side edge (1), lay
a folded strip on top so that the raw edges of the strip, match the raw
edges of the jacket. Stitch the strip to the jacket about 1/8" away from
the fold. Add in another strip as necessary by placing the beginning of
the 2nd strip next to the end of the 1st. There is no need to sew the strips
together or overlap them.
8. Continue adding strips on the opposite
side edge (2), the bottom back (3), inside front (4), then bottom fronts
(5&6).
9. Underarm inserts: Cut 4 rectangles of outer
fabric 5"x7". Using a 1/4" seam allowance, sew 2 rectangles together RST,
leaving an opening on a 7" side. Turn right side out. On the inside of
the jacket, position the rectangle at the underarm and top stitch
the long edges to the lines of stitching created from adding the strips.
Repeat for 2nd side.
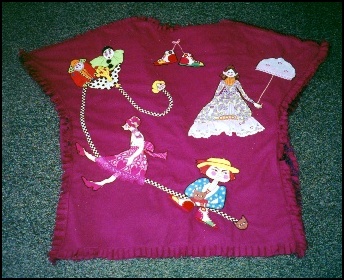
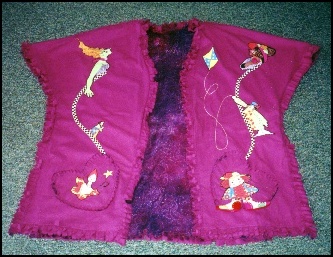
10. Pockets: Draw out heart shape for pockets on
right side of outer fabric - or whatever shape you want. Apply appliques
to pockets. Place outer and lining fabrics WST and cut out pocket shapes
and stitch all the way around 1/2" from raw edges. Create fringe by cutting
raw edges every 1/2" to stitching line all the way around. Top stitch pockets
to jacket leaving an opening at the top wide enough for your hand.
11. Go around the entire jacket cutting the
raw edges to the stitching every 1/2" including the shoulder seams. Each
time you wash the jacket the edges will fray and curl up a little more
to add to the funky factor!
|


 So
many people have enjoyed Bonnie's colorful jacket and asked her for the
instructions that we decided to share them with you here. The sky's truly
the limit for embellishing this fun and oh-so-easy to make project. We'll
be looking forward to seeing your pictures and putting them in our Dollmaker's
Showcase.
So
many people have enjoyed Bonnie's colorful jacket and asked her for the
instructions that we decided to share them with you here. The sky's truly
the limit for embellishing this fun and oh-so-easy to make project. We'll
be looking forward to seeing your pictures and putting them in our Dollmaker's
Showcase.